
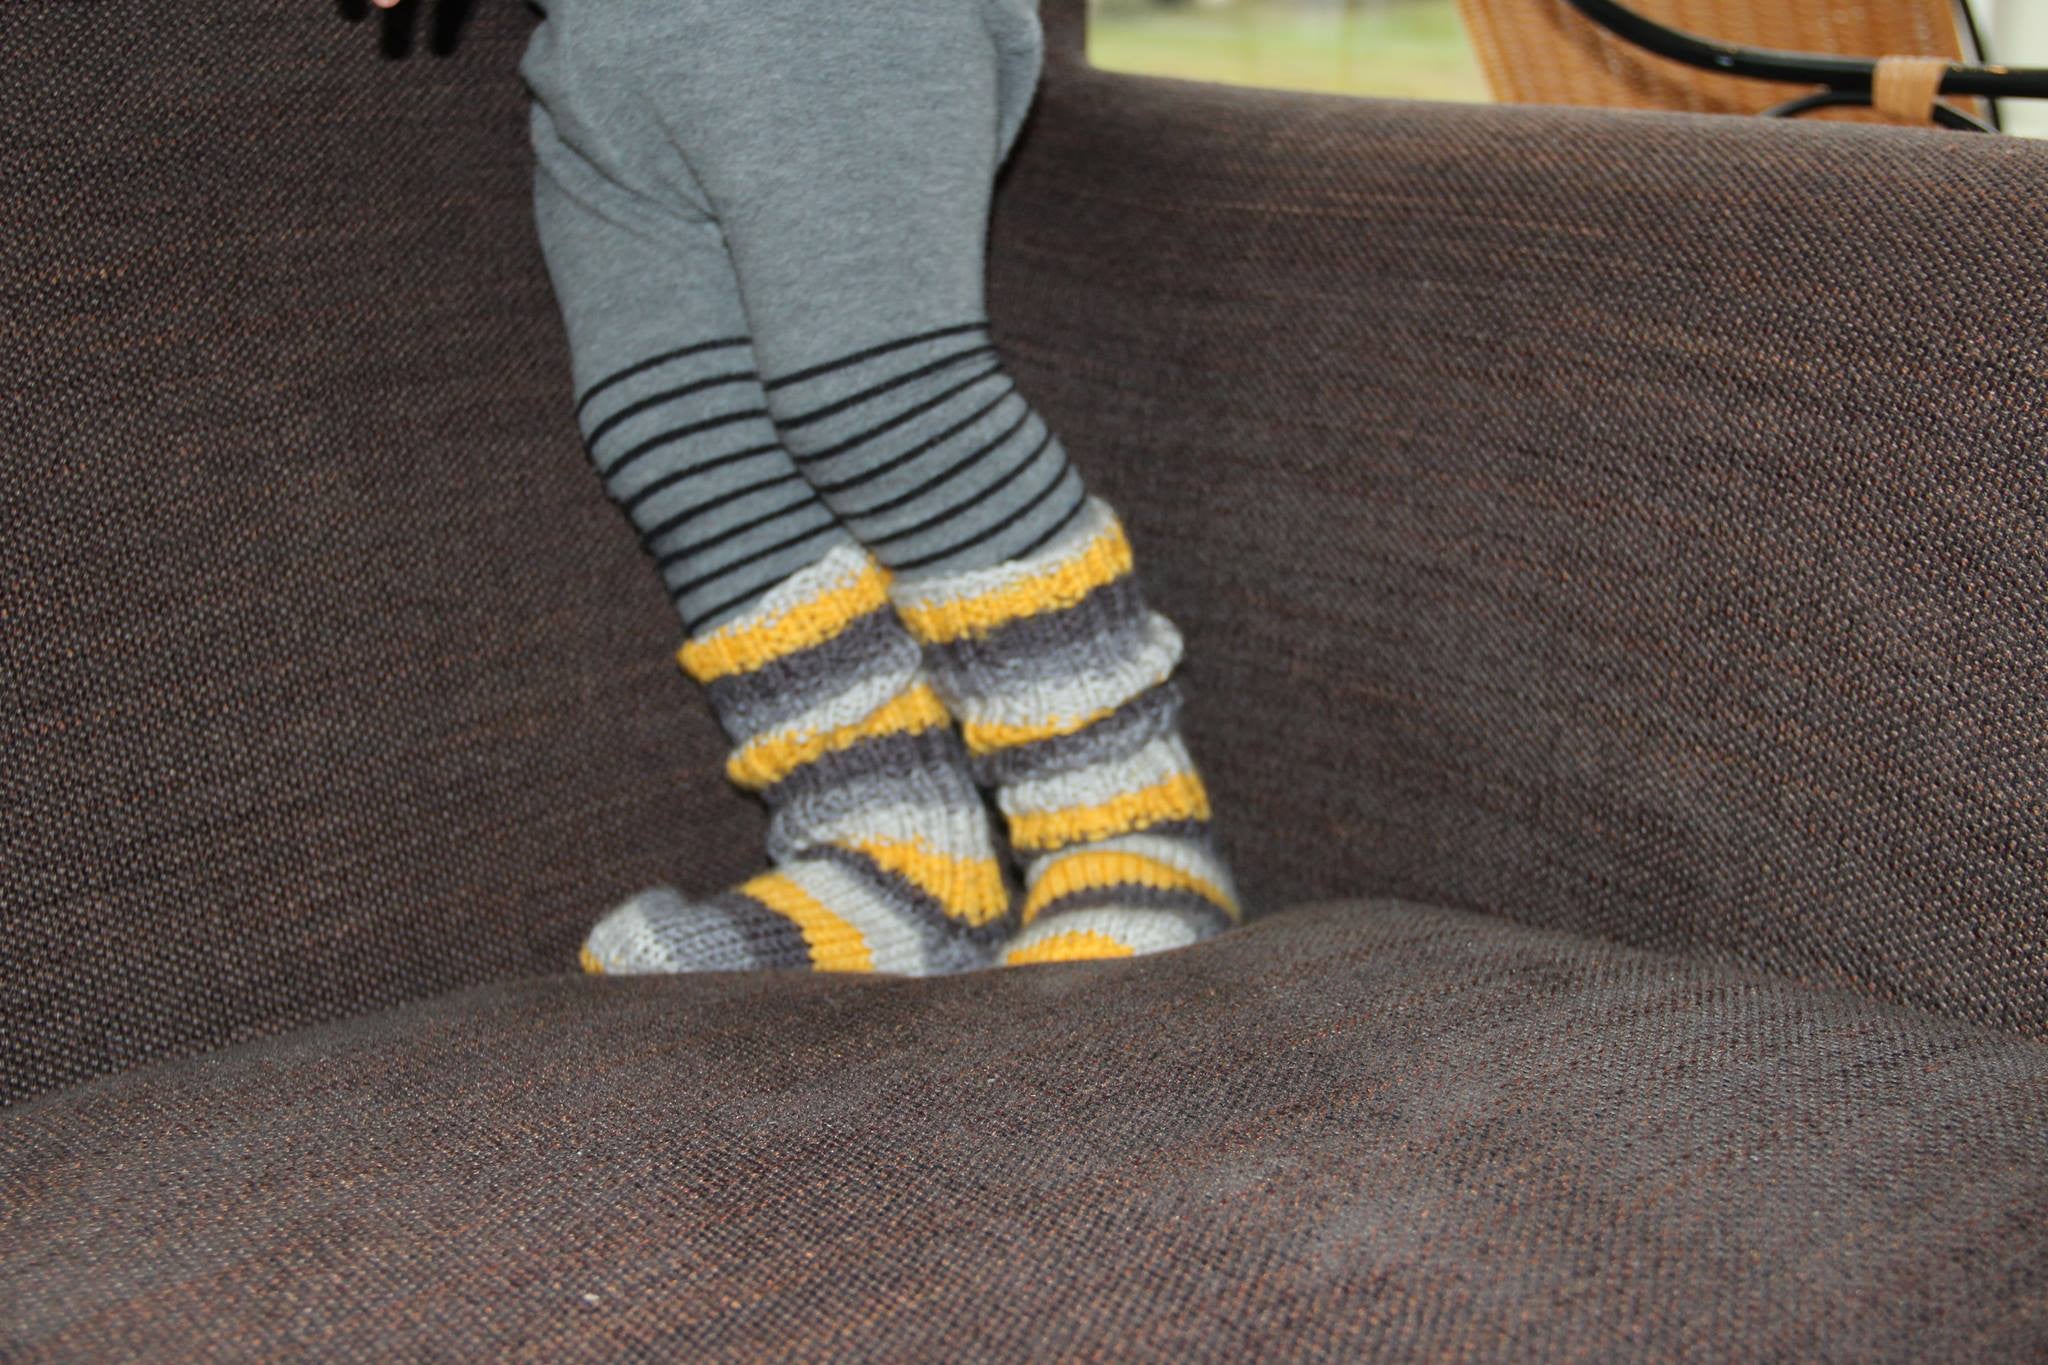
It's all about the heel !
My son needed warm socks for preschool, so naturally I started digging through my stash looking for sock yarn and then I went ravelry browsing (what else?).
Yes, I have a million sock patterns, and yes I have made enough socks to not need a pattern at all, but I’m always looking to learn something new and exciting when it comes to knitting.
After a few hours browsing (yes, a few hours. Ravelry is sort of a black hole with endless amount of wonderful designs. I’m sure you’ve all been there) I ended up using a pattern I had in my library and have made a few times before.
I knit them top down and after finishing the heel flap I started thinking how much I hate this way of making a heel. The whole picking up stitches and having extra ends to weave in just sounds like a lot of extra work to me, and besides, it leaves a ridge on the inside of the sock that can’t be comfortable for busy little feet who run around all day long. I figured there must be a simpler way to do this!
So I ripped out the heel flap and started googling. After a surprisingly short time I found a tutorial for a short row heel. It’s a very clever construction where first you knit the heel flap back and forth while making the short rows and then you knit back and forth again closing the short rows. Simple enough right?
Well, anyone who has used short rows in their knitting knows about those dreadful gaps they leave where you make a turn. However these instructions promised it was a no wrap, no gap, easy breezy method. It almost sounds too good to be true! I had to try it.
I was using 5 needles and had my stitches evenly divided between 4 needles, so what I did was to knit the heel using just two of them. I made my short rows until I had a quarter of the stitches left and then proceeded to close the gaps using the method described. The way to do it is to knit to one stitch before the first gap, slip that stitch, make one by picking up the yarn between your slipped stitch and the next one and knitting those two together with a slip slip knit. You then turn, slip the first stitch and purl to the first gap on the other side, slip, make one and purl those two together (If you are a continental knitter like myself, make sure to move your working yarn to the front of your work while slipping purls). Keep doing this until you have closed all the gaps.

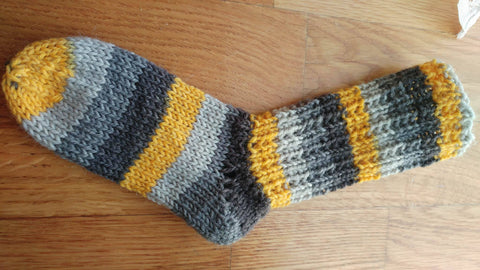
This method makes a beautiful heel with a nice shaping that hugs the heel. I really liked the construction of it but it did leave some gaps. Maybe I was doing it wrong, but I followed the instructions precisely and still had some gaps. Anyone who has ever been to England knows one should always mind the gap!
So off to youtube I went looking for a better way to use this construction. I found a video tutorial that uses a very similar approach, but when closing the gaps they would knit to one stitch before gap, knit that stitch together with the next live stitch, then make one and knit it before turning the work and slipping the newly made stitch. On the wrong side they would do the same thing but obviously purling two together and purling the new stitch.
This method left me with the same construction, but the gaps were a lot neater.
I am a continental knitter so I tend to stretch out my purls a bit, so on the knit side there were no gaps but on the purl side there were tiny ones. It’s entirely my fault, and I’m thinking I might have to start practising throwing my yarn for neater looking purls. (Or I might start using the portugese purl, although the whole wrapping the yarn around your neck seems a bit tedious to me).
I think I’ll try using the Japanese short row technique for my next pair of socks. That one may be a little extra work, but it has never left me disappointed.
For those interested here is a link to the first tutorial I followed, and here is a link to the video instructions for the second one and here is the pattern I used for this project. I made the child size but the sizes go from newborn to adult large.
Happy knitting!
Yes, I have a million sock patterns, and yes I have made enough socks to not need a pattern at all, but I’m always looking to learn something new and exciting when it comes to knitting.
After a few hours browsing (yes, a few hours. Ravelry is sort of a black hole with endless amount of wonderful designs. I’m sure you’ve all been there) I ended up using a pattern I had in my library and have made a few times before.

I knit them top down and after finishing the heel flap I started thinking how much I hate this way of making a heel. The whole picking up stitches and having extra ends to weave in just sounds like a lot of extra work to me, and besides, it leaves a ridge on the inside of the sock that can’t be comfortable for busy little feet who run around all day long. I figured there must be a simpler way to do this!
So I ripped out the heel flap and started googling. After a surprisingly short time I found a tutorial for a short row heel. It’s a very clever construction where first you knit the heel flap back and forth while making the short rows and then you knit back and forth again closing the short rows. Simple enough right?
Well, anyone who has used short rows in their knitting knows about those dreadful gaps they leave where you make a turn. However these instructions promised it was a no wrap, no gap, easy breezy method. It almost sounds too good to be true! I had to try it.
I was using 5 needles and had my stitches evenly divided between 4 needles, so what I did was to knit the heel using just two of them. I made my short rows until I had a quarter of the stitches left and then proceeded to close the gaps using the method described. The way to do it is to knit to one stitch before the first gap, slip that stitch, make one by picking up the yarn between your slipped stitch and the next one and knitting those two together with a slip slip knit. You then turn, slip the first stitch and purl to the first gap on the other side, slip, make one and purl those two together (If you are a continental knitter like myself, make sure to move your working yarn to the front of your work while slipping purls). Keep doing this until you have closed all the gaps.

This method makes a beautiful heel with a nice shaping that hugs the heel. I really liked the construction of it but it did leave some gaps. Maybe I was doing it wrong, but I followed the instructions precisely and still had some gaps. Anyone who has ever been to England knows one should always mind the gap!
So off to youtube I went looking for a better way to use this construction. I found a video tutorial that uses a very similar approach, but when closing the gaps they would knit to one stitch before gap, knit that stitch together with the next live stitch, then make one and knit it before turning the work and slipping the newly made stitch. On the wrong side they would do the same thing but obviously purling two together and purling the new stitch.
This method left me with the same construction, but the gaps were a lot neater.
I am a continental knitter so I tend to stretch out my purls a bit, so on the knit side there were no gaps but on the purl side there were tiny ones. It’s entirely my fault, and I’m thinking I might have to start practising throwing my yarn for neater looking purls. (Or I might start using the portugese purl, although the whole wrapping the yarn around your neck seems a bit tedious to me).
I think I’ll try using the Japanese short row technique for my next pair of socks. That one may be a little extra work, but it has never left me disappointed.
For those interested here is a link to the first tutorial I followed, and here is a link to the video instructions for the second one and here is the pattern I used for this project. I made the child size but the sizes go from newborn to adult large.
Happy knitting!
.%20Yes,%20I%20have%20a%20million%20sock%20patterns,%20and...)
4 comments
I pretty much cleared up difference between knit and purl rows by paying attention to angle between my needles as I form the stitches. As a continental knitter who uses Norwegian purl, I found that my purl sts were tighter than knit sts. When i knitted, my needles was very close to 90 degrees, but when i purled the angle between needles was much less. Thus there was less yarn in purl sts.
By changing angle of needles to be at right angles when purling, my rows are much more even.
D Louise l
I have been doing my socks on Magic Loop with an Afterthought Heel. You can replace the heel once they wear down. I start toe up, but those are replaceable too if you pick up the stitches beyond the increases and hold them there, snip the yarn in the toes and rip to the held stitches, cut off leaving a necessary tail, pick up the new yarn and knit a toe down.
I have been doing Magic Loop with Heel Flaps, Gusset, etc. and it works also. You just need a 40” or more longer cable and lots of locking markers to keep track of your position of all parts of the sock. Useful for decreases, increases, and lace.
Yasmin
Leave a comment
This site is protected by reCAPTCHA and the Google Privacy Policy and Terms of Service apply.